Cake, mixed with frosting, and coated in chocolate (served on a stick!)…sing me another love song! For all those cake pop lovers out there, here is a picture tutorial on how to make your own!
Before we get started, let’s all thank my beautiful sister for teaching me how to do these a few years back!
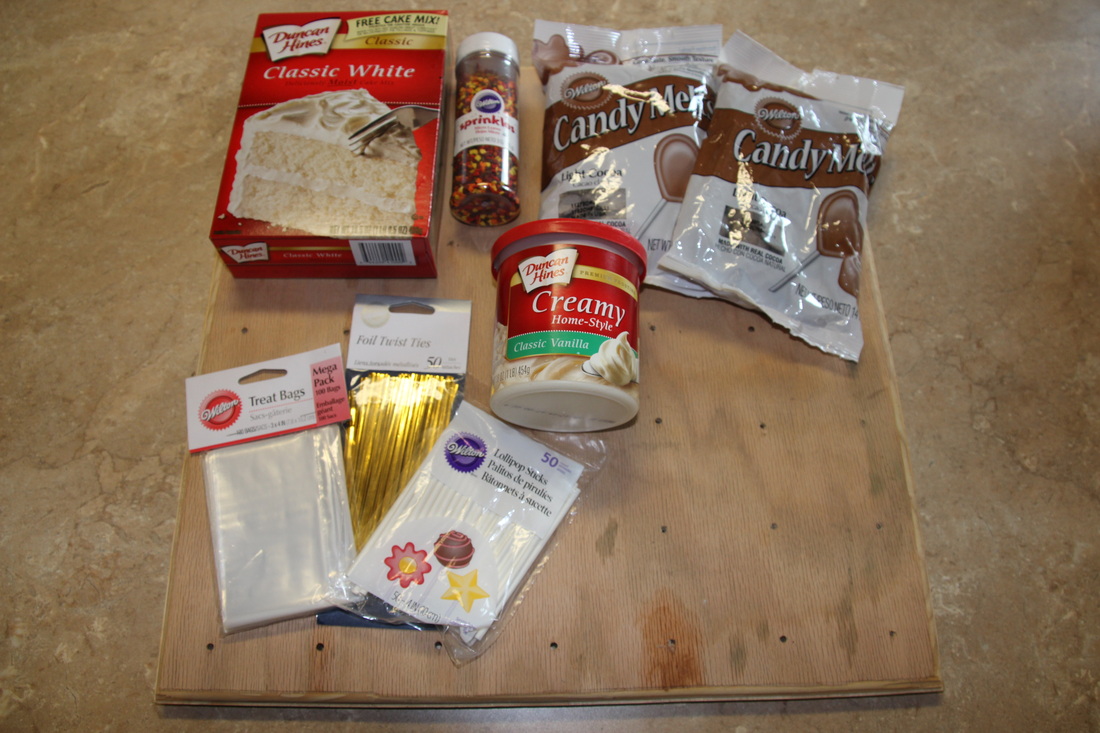
What you will need:
• Cake mix (save yourself sometime and go with a mix)
• Frosting – ½ can (I have tried using my homemade buttercream with these but found store bought frosting works the best)
• Melting chocolate – 2 bags
• Sprinkles and/or eatable decorations (optional)
• Candy sticks
• Drying rack (my brother-in-law made mine so I can dry my cake pops standing up (I believe it’s just left over wood with drilled holes the size of the candy sticks); if you don’t feel like making a drying rack (or buying one), simply line a cookie sheet or the counter with wax paper).
• Wrappers (there are two types of wrappers available; clear candy bags with twist ties, or foil candy wrappers – both can be found at any craft store in their baking section). The foil wrappers are cheaper, but don’t look the greatest on cake pops that have sprinkles/decorations (i.e. they can’t be smoothed out).
• Two free nights to hang out in the kitchen and make these! Yes – they are a little time consuming so plan accordingly!
You can make these with any cake/frosting/chocolate combination you like! Be creative!! The cake pops I am showing below are “classic” flavoring (white cake, vanilla frosting, and milk chocolate).*
Before we get started, let’s all thank my beautiful sister for teaching me how to do these a few years back!
What you will need:
• Cake mix (save yourself sometime and go with a mix)
• Frosting – ½ can (I have tried using my homemade buttercream with these but found store bought frosting works the best)
• Melting chocolate – 2 bags
• Sprinkles and/or eatable decorations (optional)
• Candy sticks
• Drying rack (my brother-in-law made mine so I can dry my cake pops standing up (I believe it’s just left over wood with drilled holes the size of the candy sticks); if you don’t feel like making a drying rack (or buying one), simply line a cookie sheet or the counter with wax paper).
• Wrappers (there are two types of wrappers available; clear candy bags with twist ties, or foil candy wrappers – both can be found at any craft store in their baking section). The foil wrappers are cheaper, but don’t look the greatest on cake pops that have sprinkles/decorations (i.e. they can’t be smoothed out).
• Two free nights to hang out in the kitchen and make these! Yes – they are a little time consuming so plan accordingly!
You can make these with any cake/frosting/chocolate combination you like! Be creative!! The cake pops I am showing below are “classic” flavoring (white cake, vanilla frosting, and milk chocolate).*
Night One:
1. Bake your cake and let it cool. Once it is completely cooled, crumble it up into a large mixing bowl. (When I say crumble, I mean crumbs – there should be no large chunks of cake).
1. Bake your cake and let it cool. Once it is completely cooled, crumble it up into a large mixing bowl. (When I say crumble, I mean crumbs – there should be no large chunks of cake).
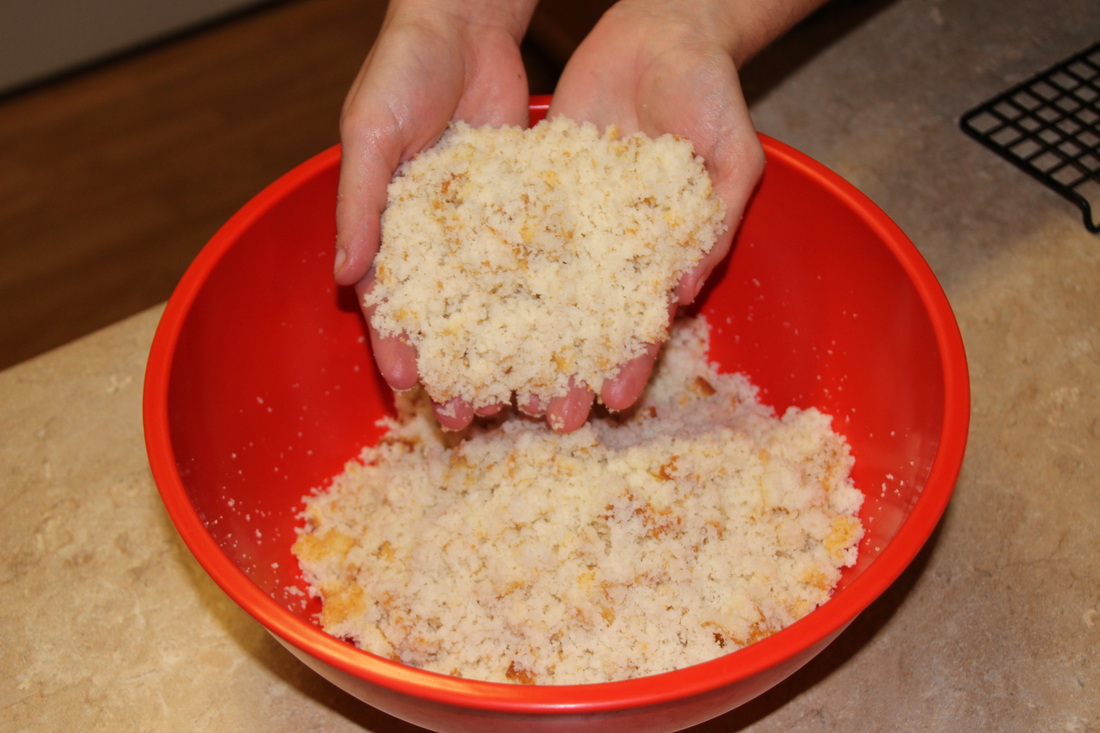
2. Add your frosting – use your hands and gently combine the frosting with the cake. The consistency should be just sticky enough to roll little balls. Start rolling and forming your cake balls! You want them each to be about half the size of a ping pong ball.
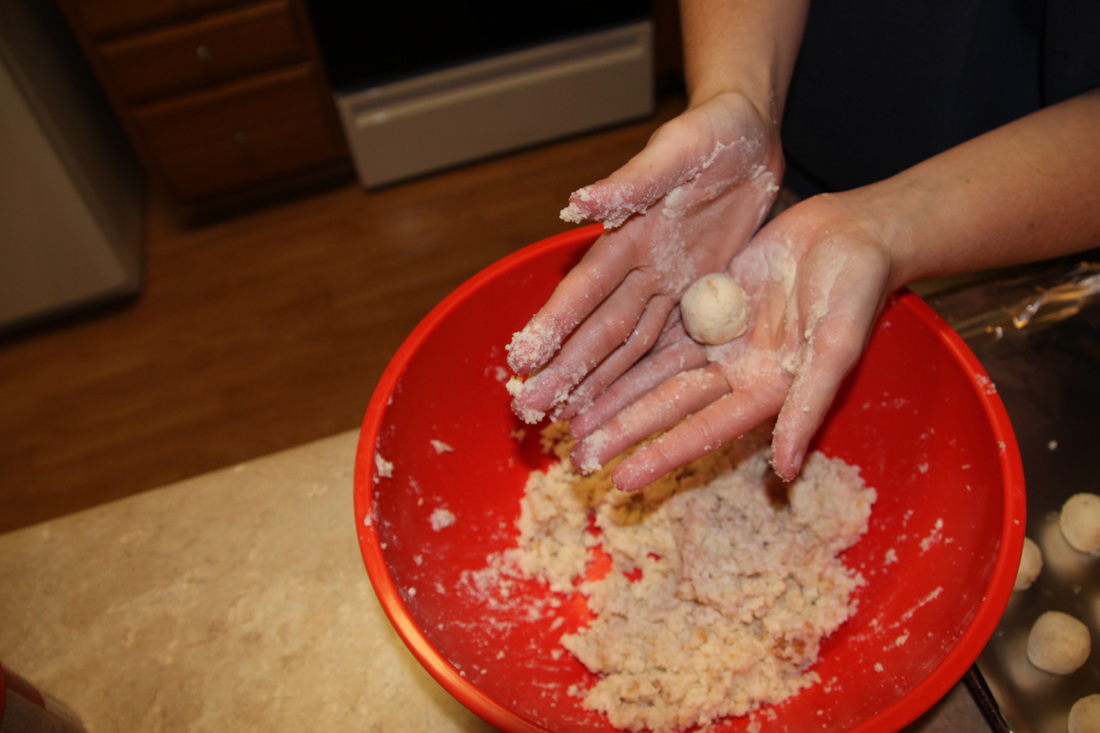
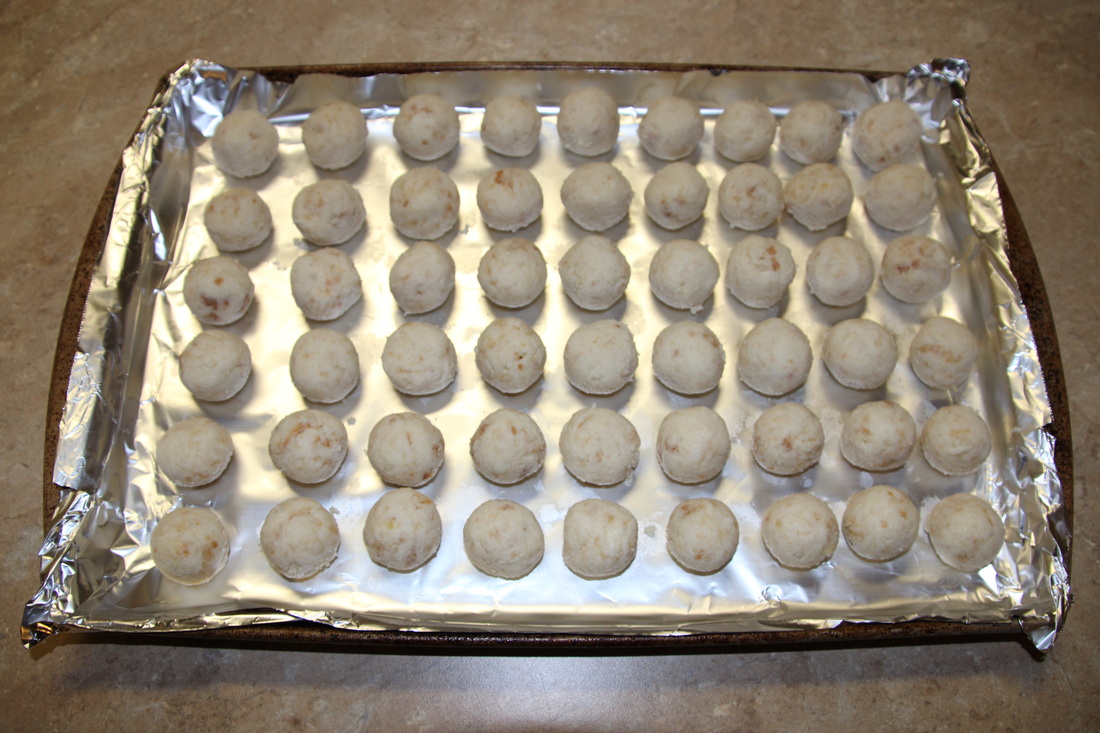
3. Line up all your cake balls on a lined cookie sheet, cover with plastic wrap, and place them in the freezer to set overnight.
Night Two:
1. Melt your chocolate. As you can see, I like to use Wilton’s chocolate melting pot. (Using a double boiler or the microwave works great too – just melt them in smaller batches and know you will need to work a lot quicker).
2. While your chocolate is melting, you want to set up your assembly line – sticks, melted chocolate, bowl of sprinkles/eatable decorations, drying rack, and finally wrappers.
3. Once your chocolate is melted, grab three cake balls from the freezer and start putting the cake pops together! Note, you only want to grab three cake balls at a time because they thaw quickly and you want them frozen so they stay together while you are covering them in chocolate.
a. Grab a cake ball and a stick, dunk the tip of the stick in the chocolate and quickly place in the center of the cake ball.
b. Dunk the cake ball in the chocolate (and let the excess chocolate drip off).
c. Slide over to your sprinkles/eatable decorations and cover your cake pop quickly (the chocolate dries fast).
d. Place on your drying rack.
4. Once you have completed all your cake pops, let the chocolate fully harden (about 30 minutes) before placing in your wrappers.

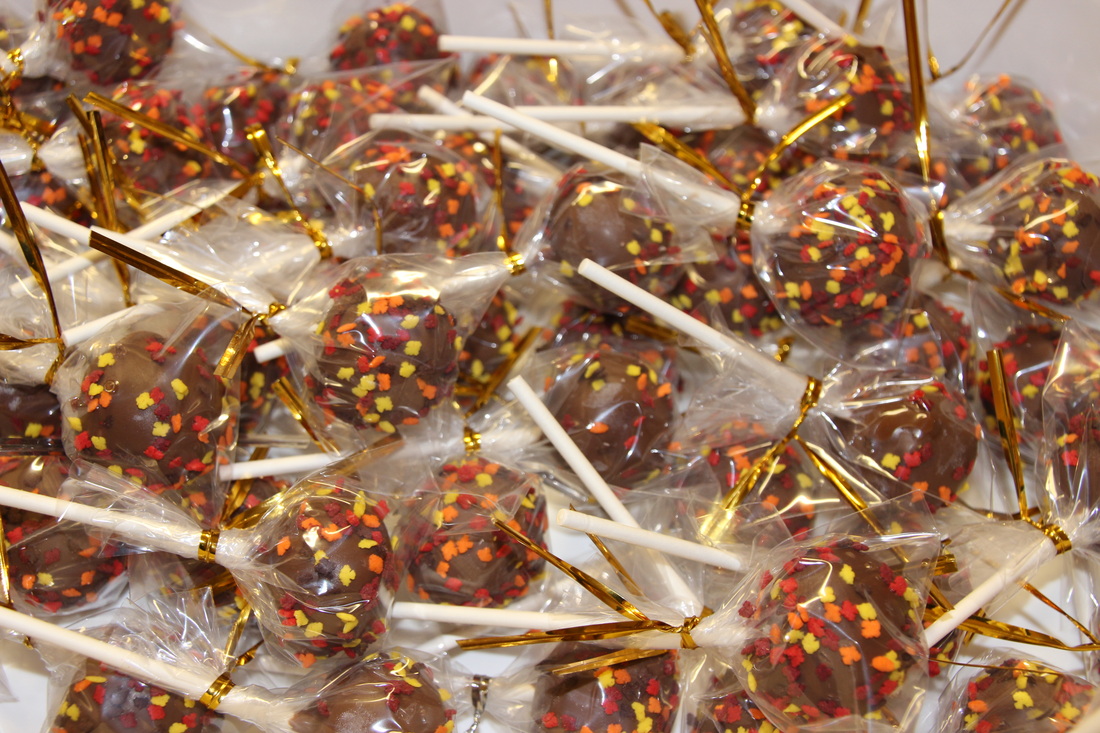
These will keep on the counter for a few days. If you need them to last a little longer – because you made them a few days ahead of time – you can store them in a fridge.
*Here are a few examples of different flavorings I have tried:
• White cake, vanilla frosting, milk or dark chocolate
• Funfetti cake, vanilla frosting, milk or dark chocolate
• Chocolate cake, chocolate frosting, milk or dark chocolate
• Champagne cake, strawberry frosting, dark chocolate
• Red velvet cake, cream cheese frosting, white chocolate
• Lemon cake, vanilla frosting, white chocolate
