I started combing through Pinterest for first birthday ideas when our little lady hit 6-months old. Even though we weren’t going to have a big bash, we were going to have close family over to celebrate – around 15 people – and I wanted to decorate house. After all, it’s her 1st birthday (!) and she probably won’t have another big party until she hits school age and invites her class. Plus, it’s a good excuse for me to go to the craft store and work on projects :) (I decided early on that I wanted everything to be DIY – not only did I want to put the time and effort (i.e. love) into my own daughters party, I ultimately didn’t want to spend an arm and a leg).
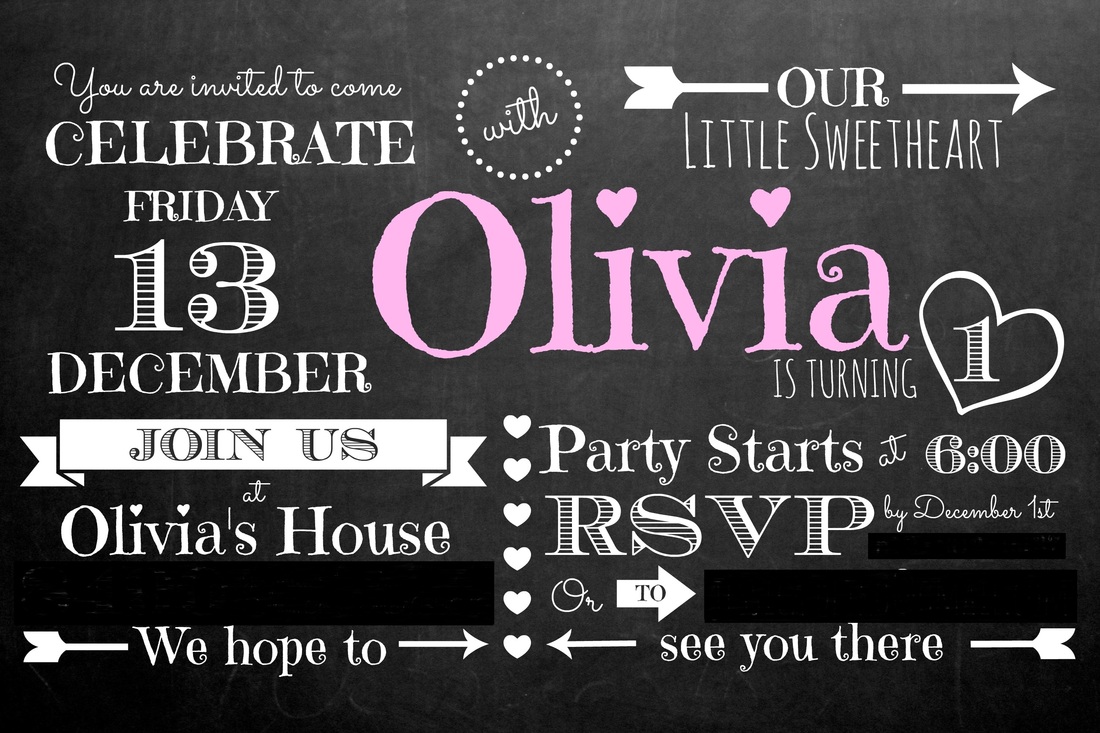
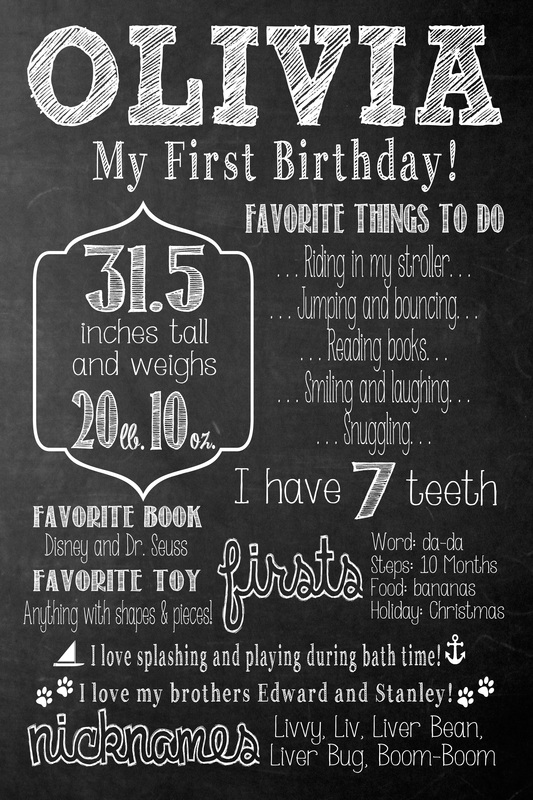
I went through multiple phases when it came to the little ladies first birthday party. The theme ideas varied from owls to Disney to Minnie Mouse to UNO to hearts to pink (which isn’t even a theme…it’s just a color…). I finally decided that I didn’t want a theme. The party didn’t need one. Instead, I settled on three basic colors and went from there. When it came to picking out the colors, here is how my mind worked… chalkboards are hot right now, chalkboards are black, what do you write on a chalkboard with, white chalk, what do we call Little Lady O, our sweetheart, what color are hearts, red, what’s a girly red, pink! There are my colors, black, white and pink!
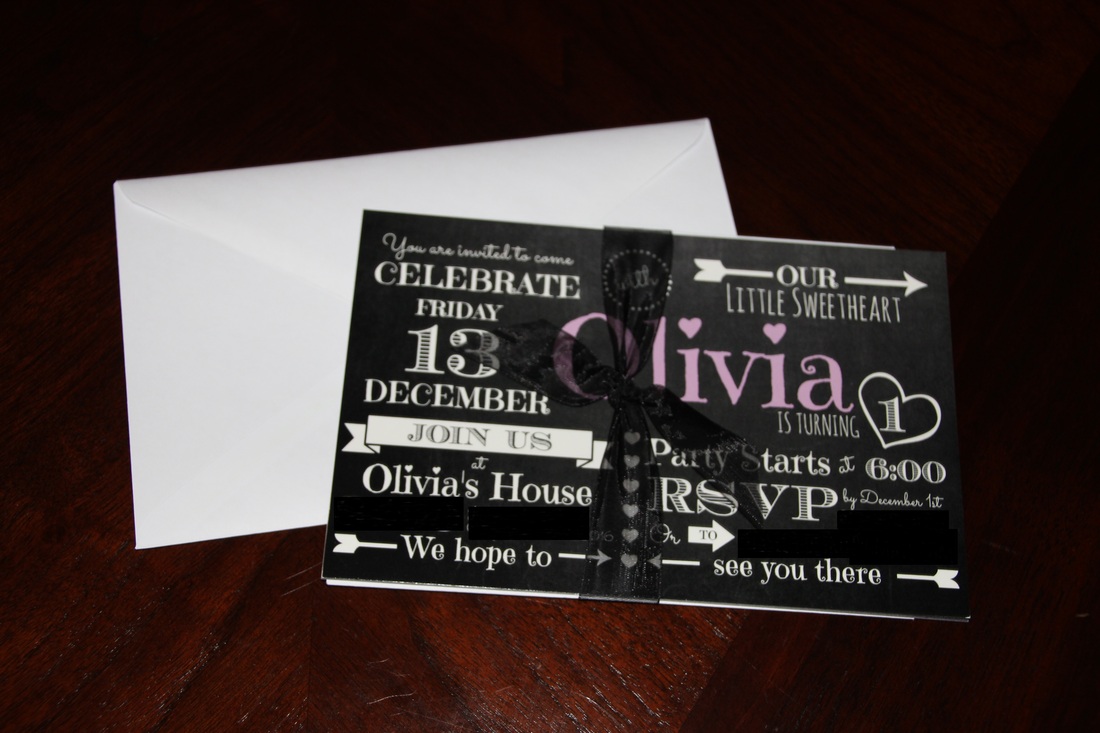
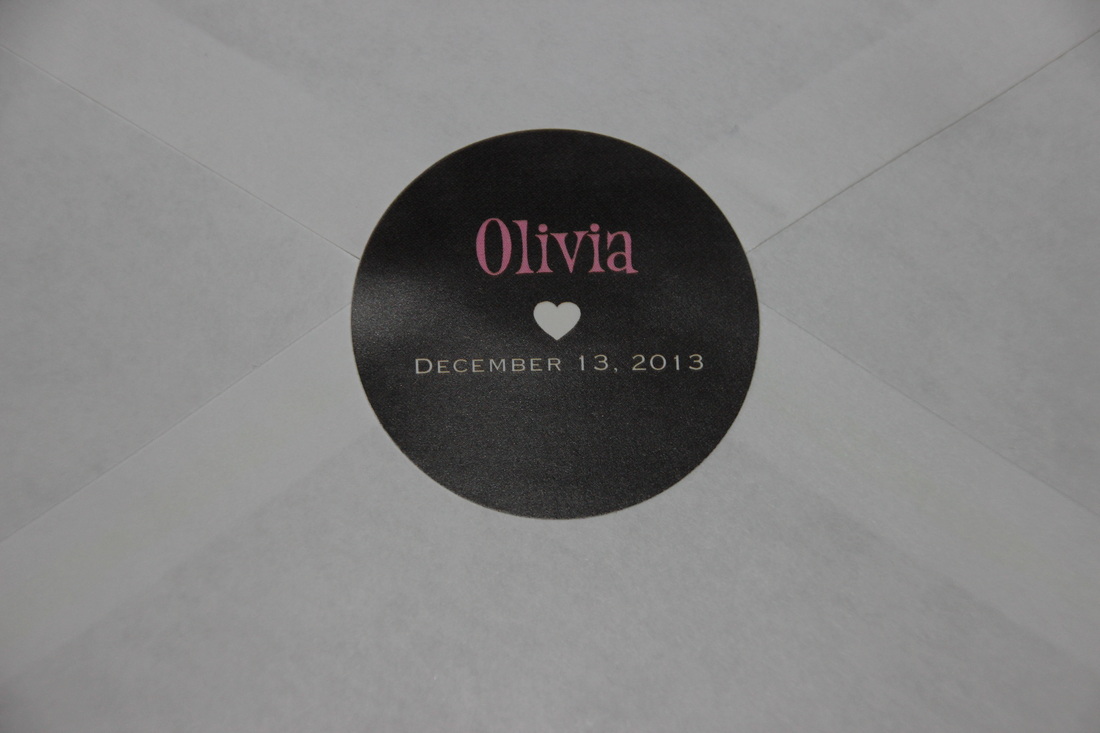
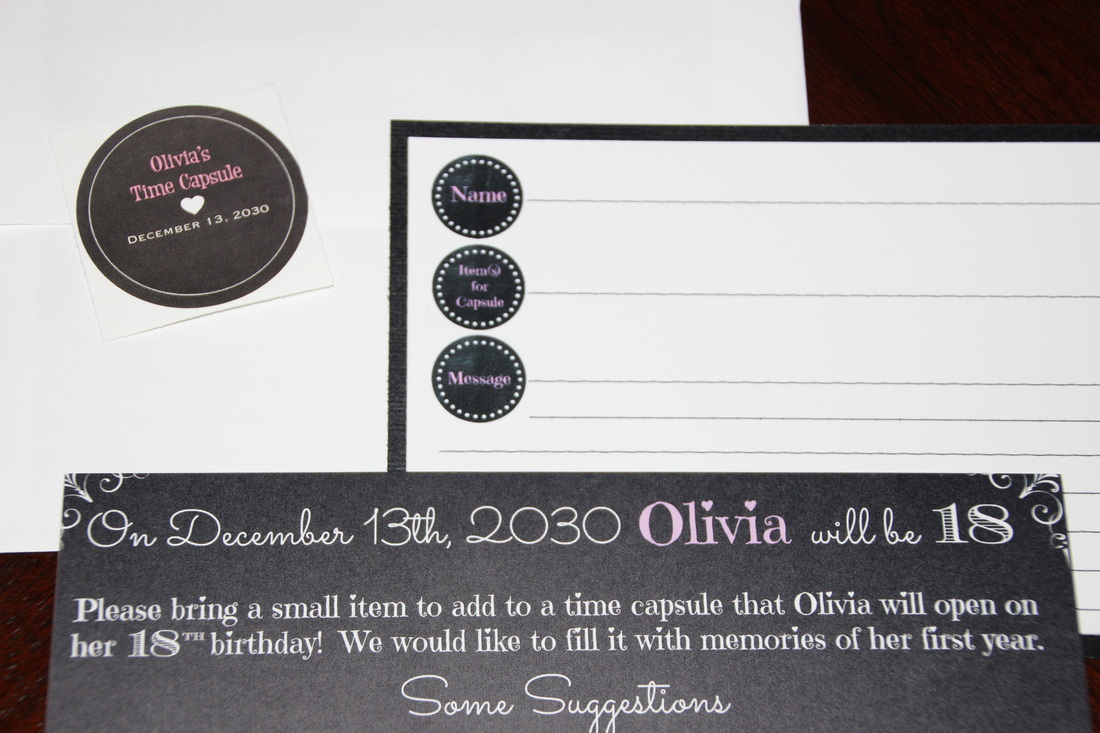
Invites: I enjoy working in Photoshop so this was a DIY project I was very excited about. The invitation , time capsule cards, and both envelope seals were uploaded and printed off through Vista Print. I printed off the time capsule message cards at home on card stock and mounted them on black, sparkly card stock. Each invitation set included an invite, a time capsule card, and an envelope containing time capsule message cards (1 for each person of the invited family) and a seal.
I went through multiple phases when it came to the little ladies first birthday party. The theme ideas varied from owls to Disney to Minnie Mouse to UNO to hearts to pink (which isn’t even a theme…it’s just a color…). I finally decided that I didn’t want a theme. The party didn’t need one. Instead, I settled on three basic colors and went from there. When it came to picking out the colors, here is how my mind worked… chalkboards are hot right now, chalkboards are black, what do you write on a chalkboard with, white chalk, what do we call Little Lady O, our sweetheart, what color are hearts, red, what’s a girly red, pink! There are my colors, black, white and pink!
Invites: I enjoy working in Photoshop so this was a DIY project I was very excited about. The invitation , time capsule cards, and both envelope seals were uploaded and printed off through Vista Print. I printed off the time capsule message cards at home on card stock and mounted them on black, sparkly card stock. Each invitation set included an invite, a time capsule card, and an envelope containing time capsule message cards (1 for each person of the invited family) and a seal.
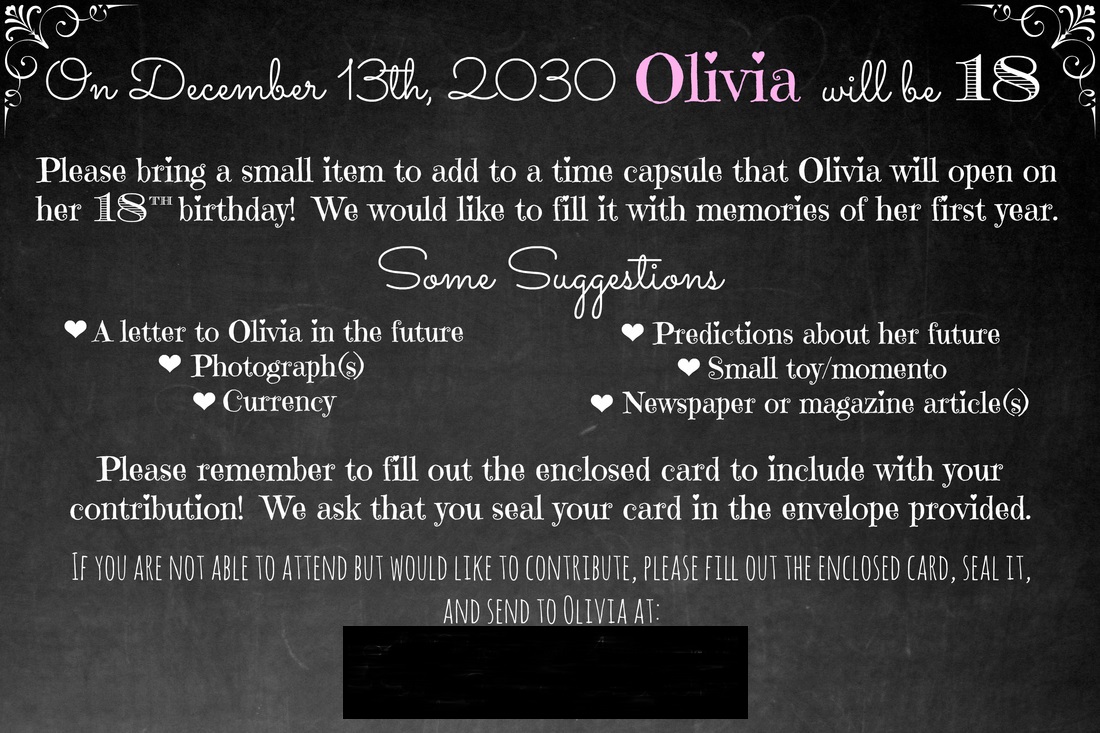
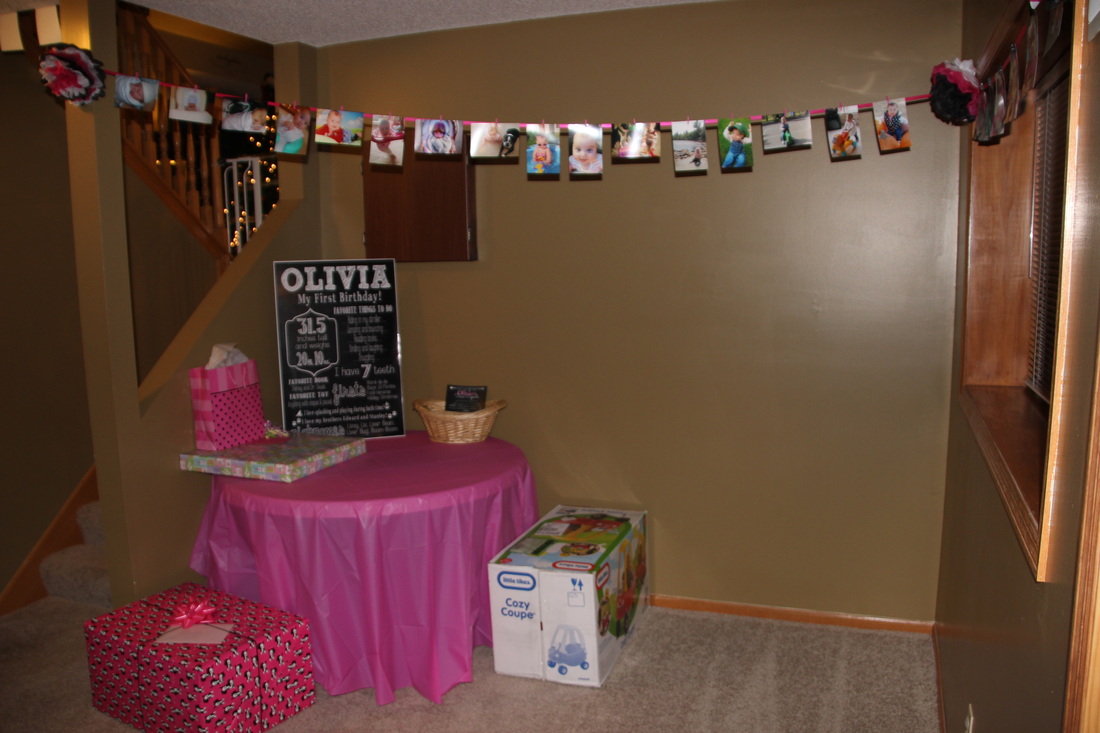
Time Capsule Cards: This was a super cute idea I found all over Pinterest! What an awesome way to capture what life was like during her first year! From the sounds of it too, everyone had a fun time coming up with an item for the capsule. Most are wrapped so we have no idea what she will find 18 years down the road; the few items that we were not wrapped and we were able to see are a hand print ornament (her hand print and her cousins), a fashion magazine, rainbow loom bracelet, and a Twinkie. All of the messages are sealed up, I wanted these to be private and a surprise. As you can see on the gift table, I just had out a basket for everyone to place their items in. I wanted to wait to create the actual time capsule until I saw what everyone brought. (I’ll share what the final product looks like and how our adventure burring it in the back yard goes this spring!)
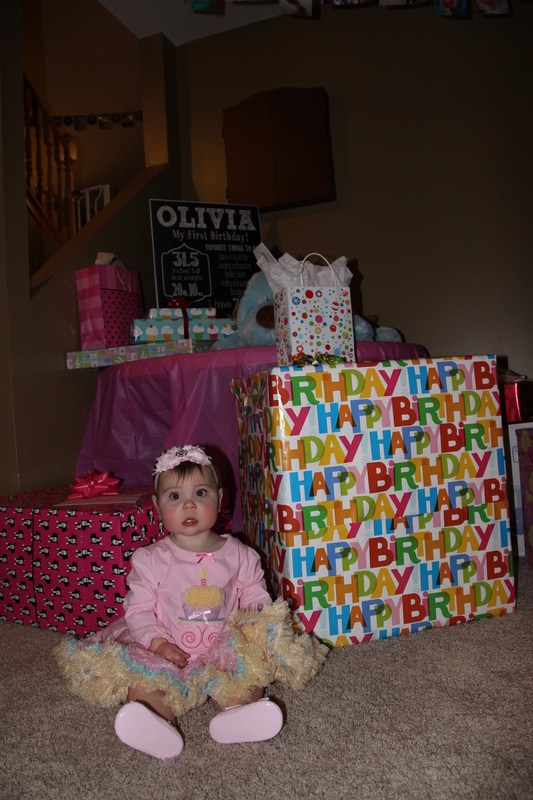
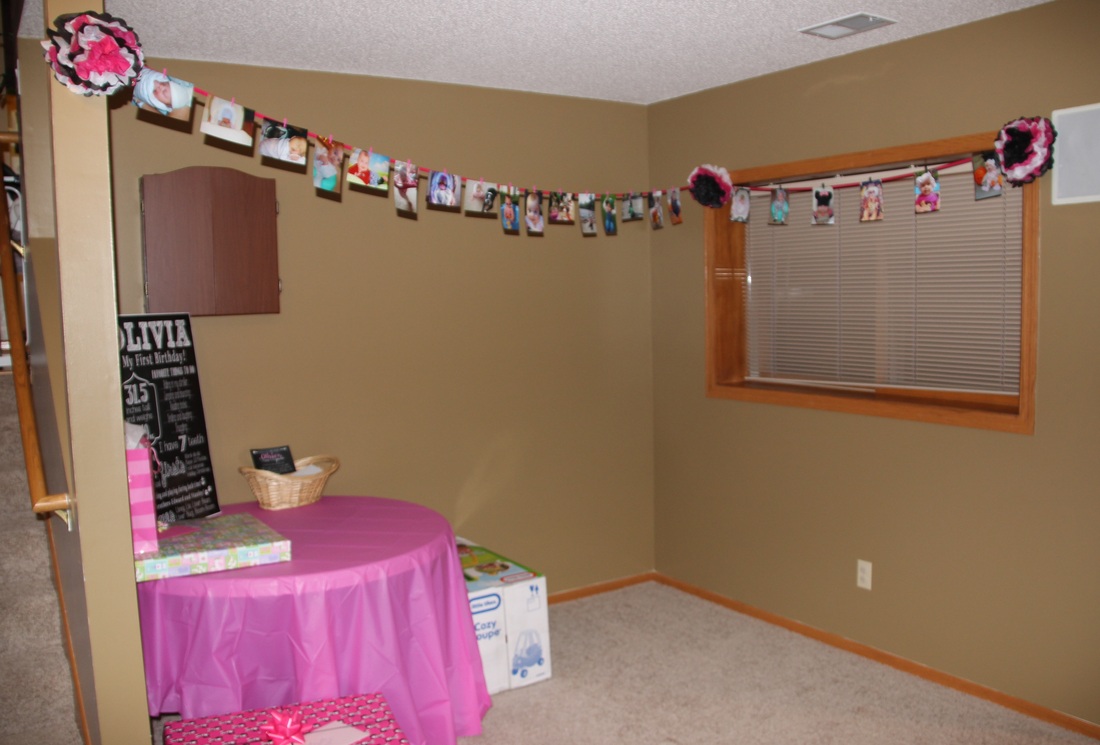
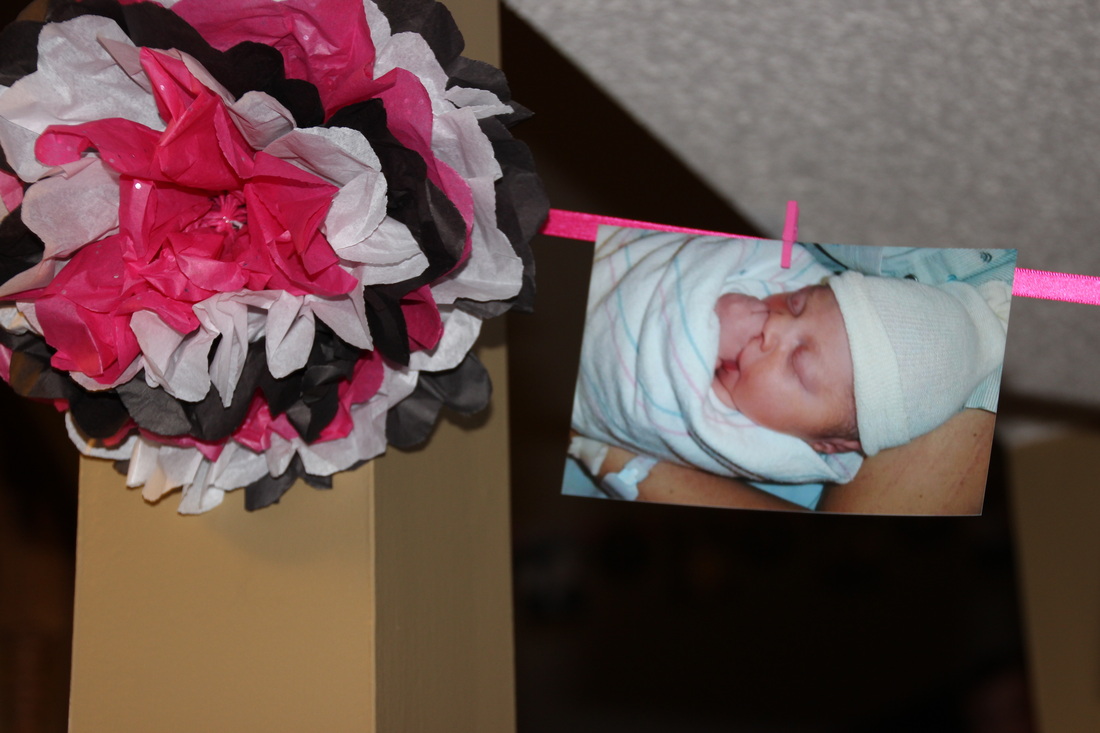
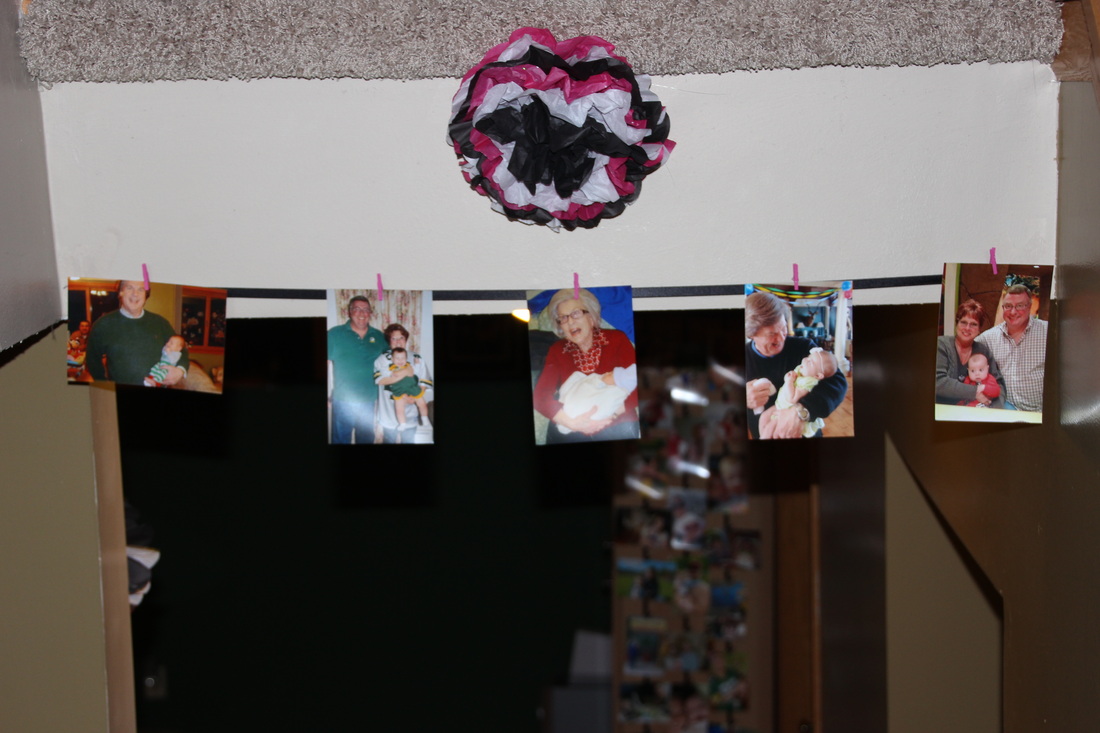
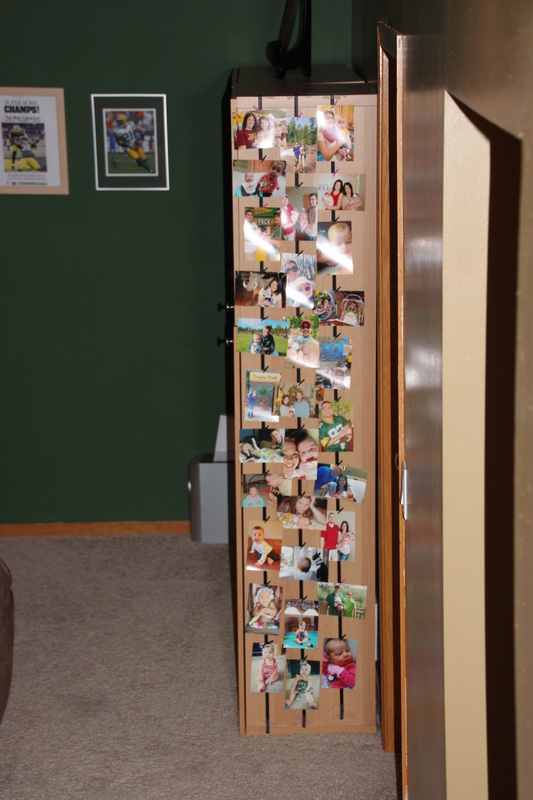
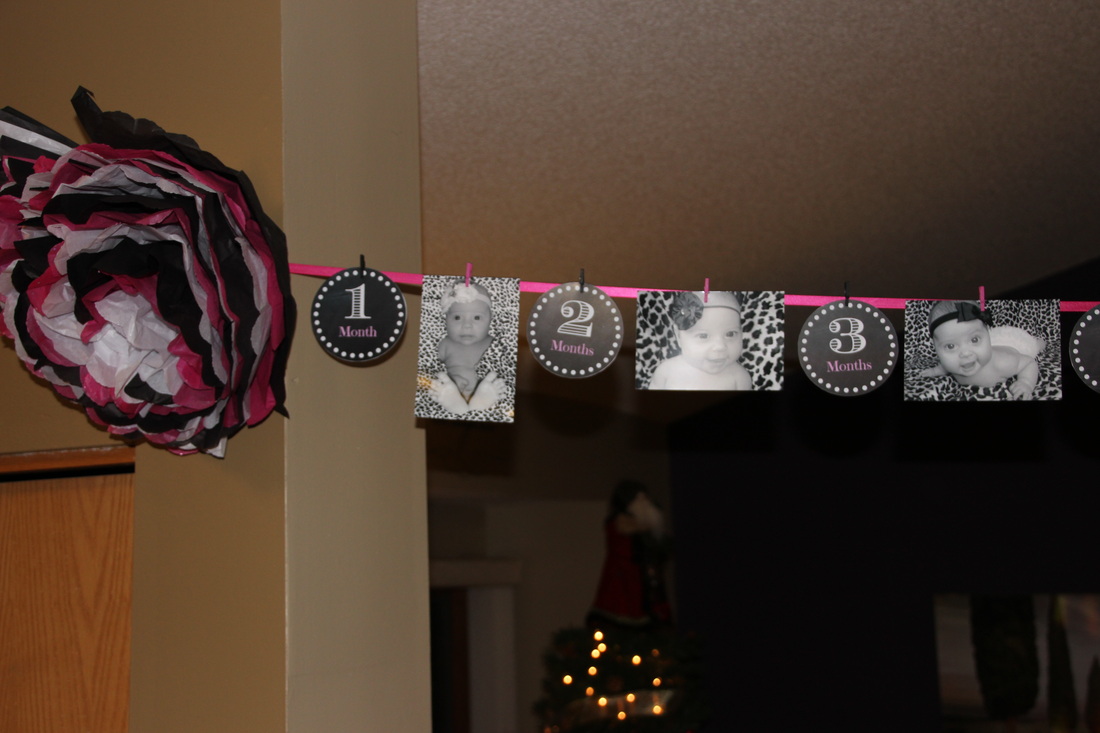
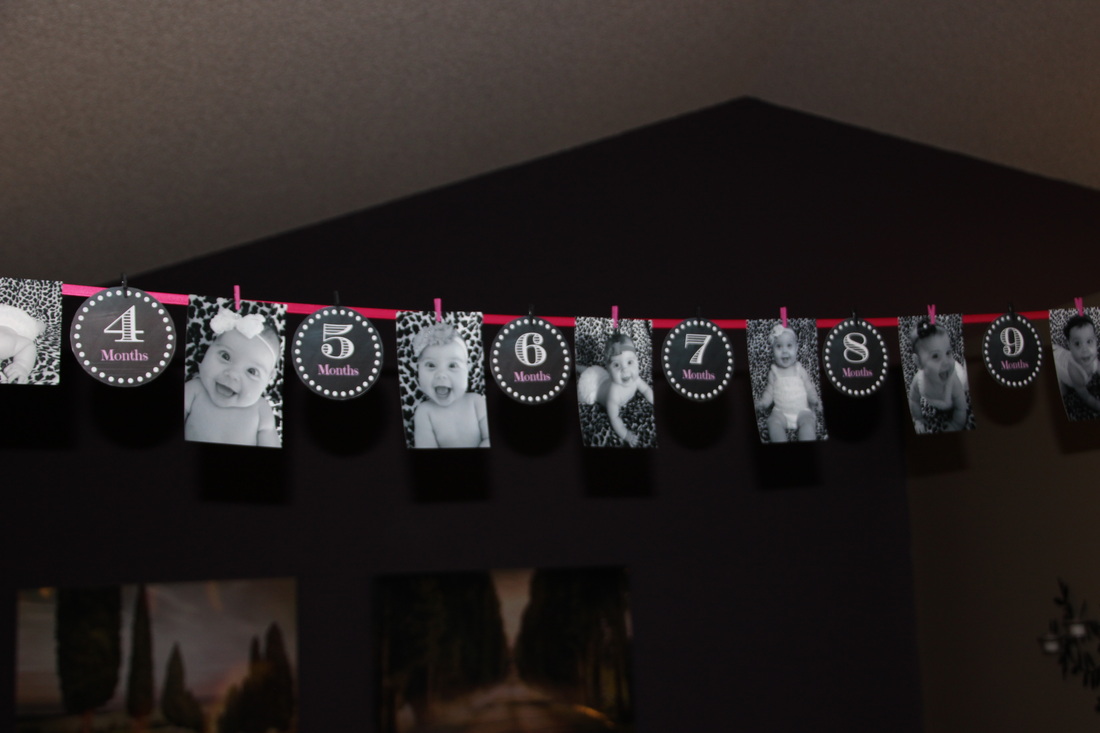
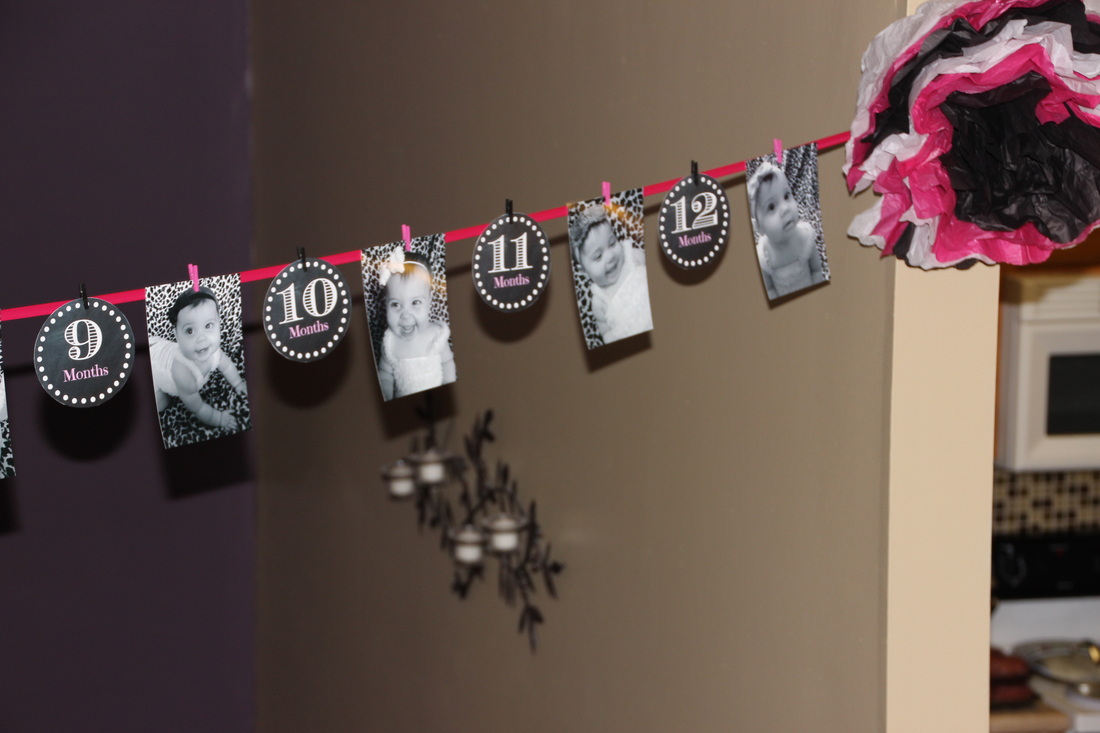
Decorations: I LOVED the idea of using photos of the little lady from her first year to decorate the house (seen here, here, and here). What an awesome and simple idea; plus, I’ll have all the pictures I want/need to use for her baby book – BONUS! As you can see, it was super simple, I just used ribbon and mini clothes pins to do this. We did one long “Watch Me Grow” banner. This was my favorite! I loved that at a glance you could see how much she grew each month. (I was also super happy that I kept to taking a photo of her each month, on her the same date, in the same outfit, with the same background – the banner and soon to be 8x8 Watch Me Grow book – made it all worthwhile!) I also created a bunch of simple tissue paper pom-poms to add to the end of each ribbon banner, to hide the tape holding it up on the wall. While I didn’t take of a photo of it, we had three huge hot pink pom-poms attached to the lighting fixture that hung over the dining room table to add a pop of color by the food. I created a Birthday Board for her first year/cake smash photo shoot and decided we needed to get more use out it so we displayed it on the gift table for everyone to see!
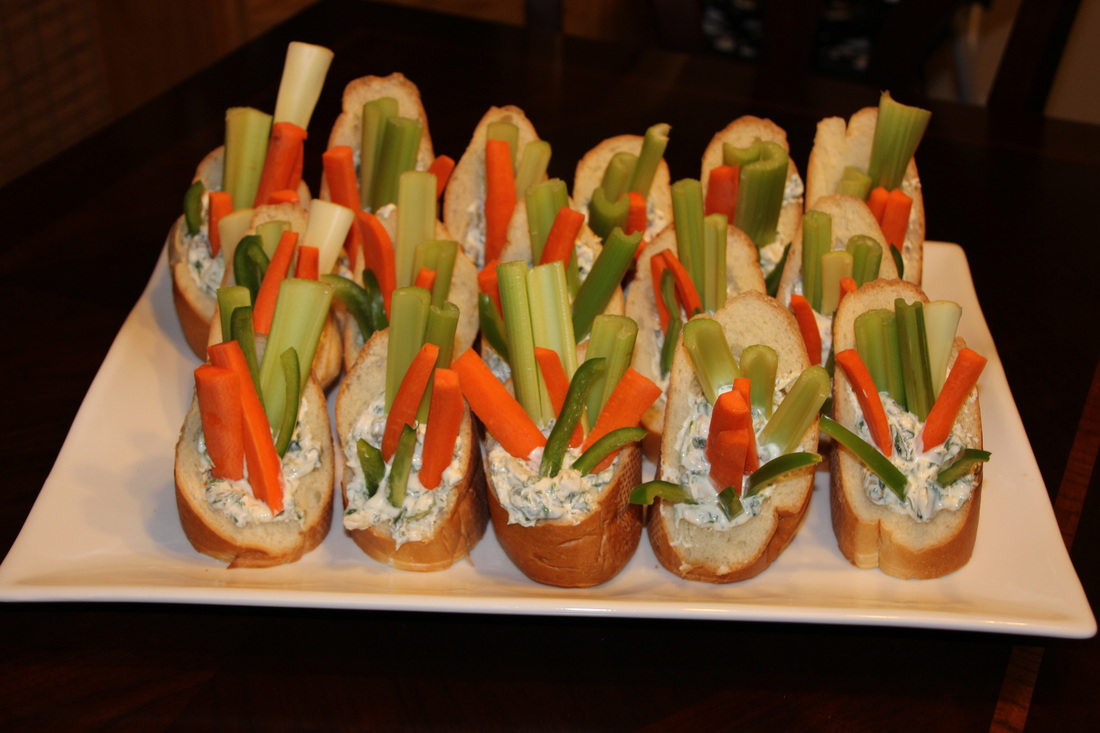
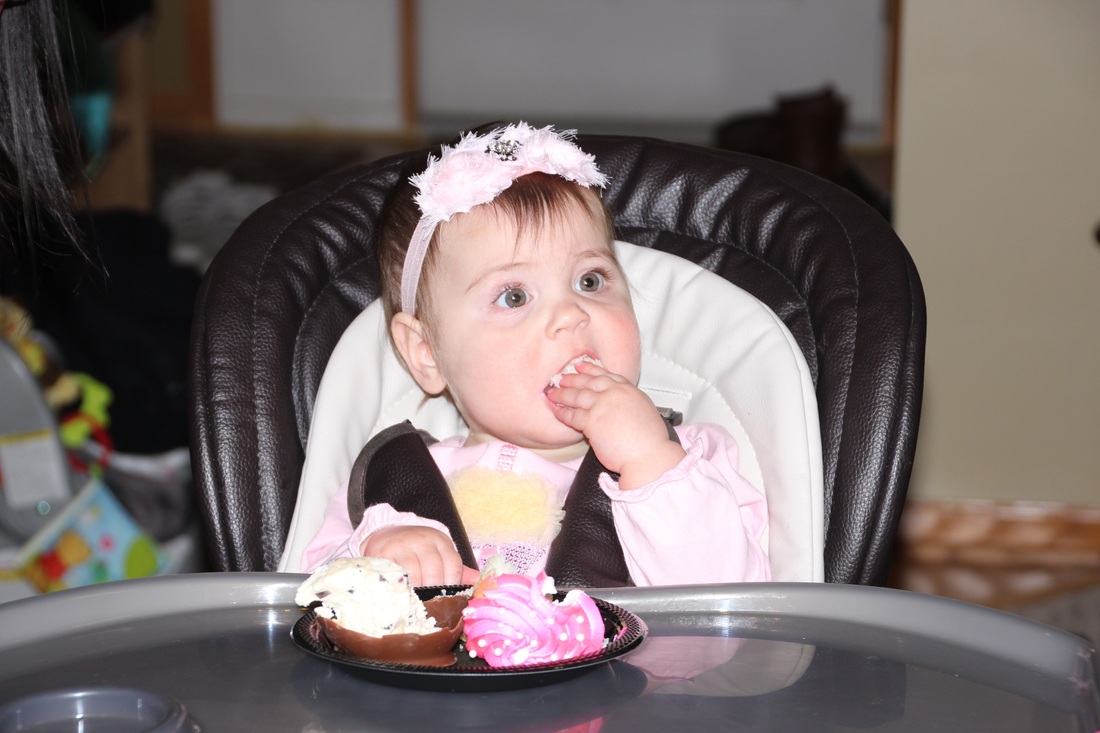
Food: My husband loves to plan the food out for parties. We could have three people coming over and he shops and cooks for an army. He decided wed should have a taste of summer in the middle of winter, so we created a burger bar! That’s right, we’re a true Minnesota family, and we grill year round. He stood out in the snow and grilled up burgers. We had a selection of 15 different toppings, 4 types of cheese, and 3 sauces/condiments for people to choose from. As appetizers, I saw this post on Pinterest and thought I had to try it. As you can see, they turned out (I don’t think you could really screw them up) and everyone loved them. I’ll definitely be making them again for parties. For dessert, we had cupcakes for everyone along with these chocolate bowls filled with ice cream. I’m super bummed that I didn’t get any photos of the finished chocolate bowls. I followed the picture instructions and they were super simple! One suggestion, the chocolate bowl and balloon must be completely frozen in order for the balloon to come out smooth. If the chocolate is even a little warmed up, the balloon won’t come out so easily and you’ll end up with broken bowls. So, save yourself and just take one bowl out of the freezer at a time, pop and pull out the balloon, place back in the freezer, grab another bowl, and repeat.
All in all it was a fabulous party and I couldn’t have asked for more for the little lady! Everything turned out, everyone had a great time, and our Little Lady O celebrated her 1st birthday in style.
All in all it was a fabulous party and I couldn’t have asked for more for the little lady! Everything turned out, everyone had a great time, and our Little Lady O celebrated her 1st birthday in style.