In the past two months Little Lady O had a couple opportunities to thank her teachers for all that they do. I wanted to share with you what she gave them.
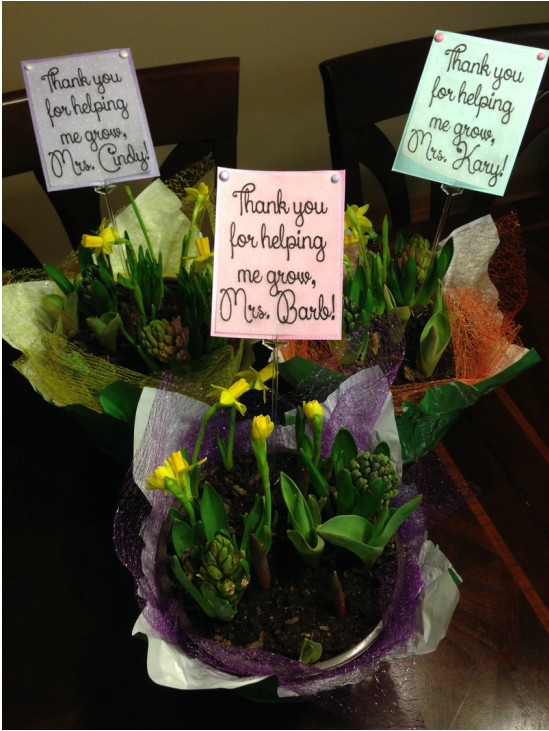
The first opportunity came when she transitioned from the infant room over to the toddler room. She had three wonderful teachers in the infant room who adored her and had been with her through all of her “firsts”. They provided us with amazing support and advice as she was growing and learning. Her transition was right before Easter and at the start of spring. I decided to head down to our local nursery and pick up a lovely bulb garden for each teacher; something they could have on their table during Easter and throughout the spring. I attached cards to each plant that I made from scrapbook paper/velum and read “Thank you for helping me grow, Mrs. _________”. I had Little Lady O sign the back of each card with her handprint. They turned out great! When I brought them in the teachers were so touched to be thought of and loved them!
The first opportunity came when she transitioned from the infant room over to the toddler room. She had three wonderful teachers in the infant room who adored her and had been with her through all of her “firsts”. They provided us with amazing support and advice as she was growing and learning. Her transition was right before Easter and at the start of spring. I decided to head down to our local nursery and pick up a lovely bulb garden for each teacher; something they could have on their table during Easter and throughout the spring. I attached cards to each plant that I made from scrapbook paper/velum and read “Thank you for helping me grow, Mrs. _________”. I had Little Lady O sign the back of each card with her handprint. They turned out great! When I brought them in the teachers were so touched to be thought of and loved them!
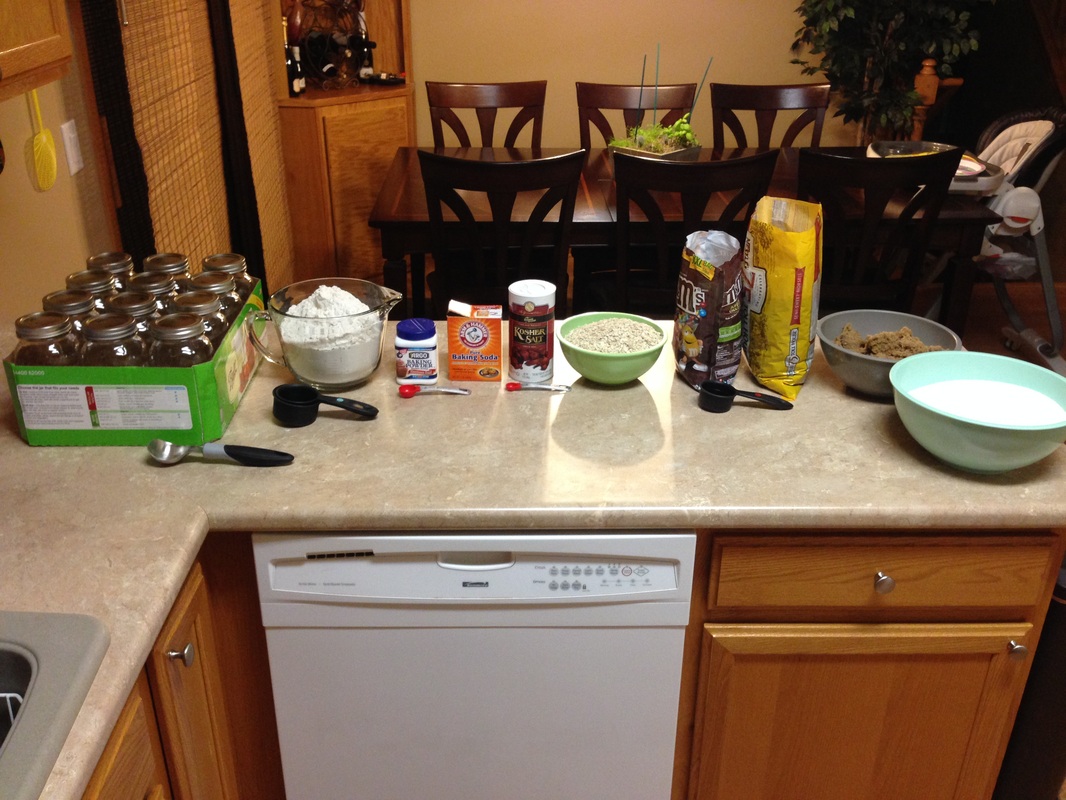
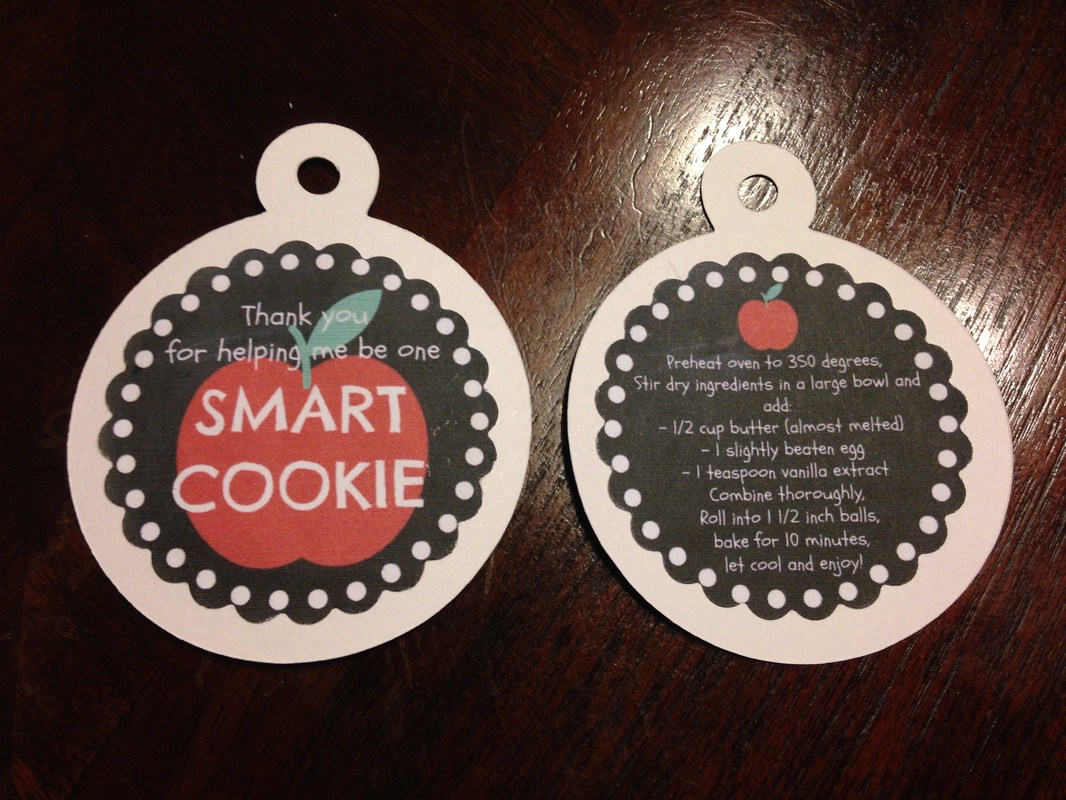
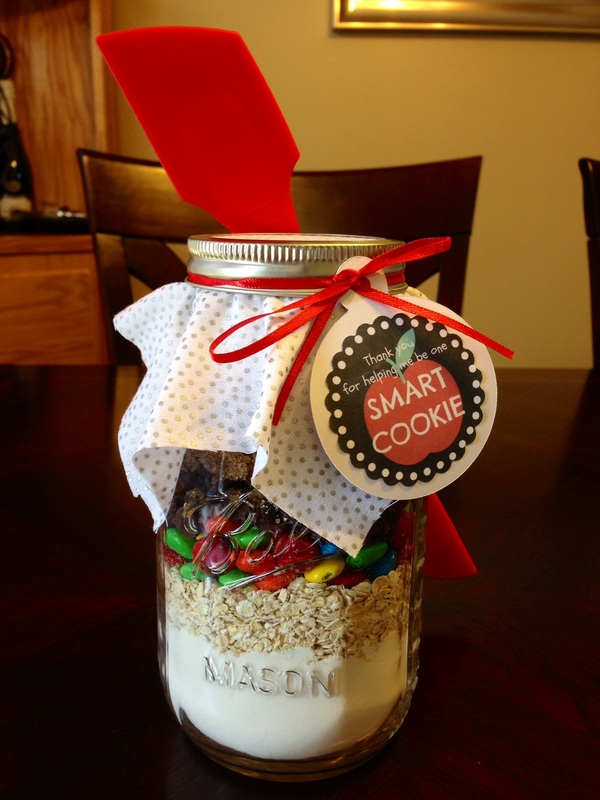
The second opportunity we had was Teacher Appreciation week at the beginning of May. Because she just transitioned from the infant room to the toddler room, I wanted to do something for the teachers in both rooms; this meant I had 9 teachers. I already knew I wanted to bring them fresh coffee and pastries on Monday morning (something to start their week out right). Along with that, I wanted to give them a little something extra. I searched Pinterest for some fun ideas and came across a few but nothing that I thought would suit everyone or would be easy to do for 9 teachers. What I ended up going with were cookies in a jar. My sister had made these as a shower gift the month before and they were a big hit. She lead me to the blog where she originally found the idea. We made two small changes to original bloggers final product – we eliminated the nuts and we changed the tags.
These were incredibly simple to make and very cost effective. I purchased the mason jars from Target, the ingredients I didn’t have already (flour, oats, M&Ms, and chocolate chips) from our local Sam’s Club and the Betty Crocker spatula’s from the Dollar Tree. I created the tags on Photoshop and used fabric and ribbon I already had home in my craft tote. Each jar of cookies came to about $4.
Here is recipe for the Cowboy Cookies, a little picture tutorial of how I put them together, and a few tips/tricks I learned along the way!
Cowboy Cookies
Ingredients for the jar
1 1/3 cup all purpose flour
1 tsp baking powder
1 tsp baking soda
1/4 tsp salt
1 cup cooking oats
3/4 cup M&Ms
3/4 cup chocolate chips
1/2 cup packed brown sugar
1/2 cup white sugar
Directions for the labelPreheat oven to 350 degrees
Stir dry ingredients in a large bowl and add:
- 1/2 cup butter (almost melted
- 1 slightly beaten egg
- 1 tsp vanilla extract
Combine thoroughly
Roll into 1 1/2 inch balls
Bake for 10 minutes
Let cool and enjoy!
Prep, prep, prep! As you can see I arranged all of my ingredients (with their respective measuring utensil) in order to create an assembly line. This made the process extremely smooth and efficient!
Pack, pack, pack! As you assemble these jars, you must remember to pack down each ingredient as you go or will not have room for all ingredients. This is extremely important! The flour layer (first layer) is the one that took the most time to pack down. I found an ice cream scoop worked well. My sister used the bottom of a baby bottle. You will notice that some jars the ingredients go all the way to the tip-top and others you have a little bit of “wiggle” room – that’s OK. The variance is because of how you packed each layer.
Decorate! Once all the jars are complete, add a little piece of fabric, ribbon, and your tag to dress these babies up! I cut my fabric into 6 in. x 6 in. squares. The labels were printed off at home and cut using a 1 in. circle craft punch. The tags that the labels were attached to were cut using the Cricut. There are many ways you could create the label and tags – be creative! You can rename these cookies for whatever your occasion is!
Accessorize! I wanted to add a little something extra onto these so I went to the Dollar Tree and picked up a red Betty Crocker spatula to attach to each jar. You can never have too many spatula’s and the red color matched the jars perfectly! I simply attached these with ribbon and voila! You have the finished product!
While I don’t have photos of it, I did wrap up each cookie jar into a white gift bag with tissue paper. I also had Little Lady O decorate each bag with a red hand print.
Monday morning came and the teachers just loved all their surprises! The following day I received many compliments on the creativity and the cookies themselves as some had already made them and one of her teachers, who is older, told me she was excited to make her cookies with her grandson that coming weekend.
A bonus to this project/gift is that if you have left overs (I had 3 jars) you can save the jars for when you want or need to make a quick a batch of cookies!
Enjoy and let me know how your jars turn out!
